Electrical quantity measurement : types of meters, ammeter and voltmeter scale interpretation and ohmmeter scale interpretation
Electrical Quantity Measurement
6–1 TYPES OF METERS
The traditional meters have a pointer moving across the face of a scale (similar to the speedometer in many cars). Such instruments are classified as analog meters. Readings from analog meters are generally limited to three-digit accuracy. The third digit must often be estimated and, therefore, is uncertain.
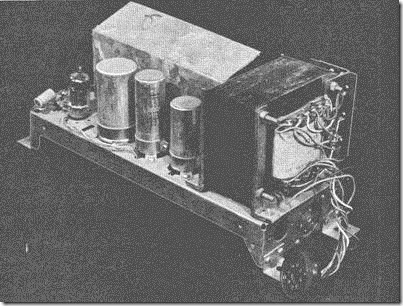
Most electrical measuring devices, from panel meters for permanent installations to portable test instruments, have made use of such analog scales. Throughout most of the twentieth century, one of the widely used portable test instruments has been the VOM (short for volt-ohm-milliamperes). Figure 6–1 shows such an instrument, while Figure 6–2 displays a magnified view of its frontal features. Compare the two figures and note that the setting of the selector switch (the large knob in the center) reveals the function and range of the instrument, which, in turn, determines the proper scale to be read. Careful inspection will reveal that the selector switch can be set to read DC volts in the upper left-hand quadrant of the circle and AC volts in the upper right-hand quadrant. Current readings in milliamperes or amperes, either DC or AC, are obtained by settings in the lower right-hand quadrant, and ohms readings are found in the lower left-hand section, as indicated by the Greek letter omega (Ω).


Note that the top scale, reading ohms, is inverted with the zero reading on the right-hand side of the scale. In preparation for a resistance reading the test leads must be shorted (touched together), whereupon the instrument pointer should move toward the 0-ohm position. If the needle does not quite reach the zero position, the instrument must be “nulled” or “zeroed in” by turning the control labeled ADJ.
By contrast, Figure 6–3 is the picture of a modern DMM (digital multimeter), which directly displays the numerical results of the measurement. Digital instruments such as this are the first choice in today’s market for new acquisitions and installations, but analog

meters will still be with us for a long time to come. Therefore, students are urged to practice reading meter scales.
6–2 AMMETER AND VOLTMETER SCALE INTERPRETATION
The skill of interpreting various analog scales is a necessary and valuable asset to any technician. Students are therefore encouraged to carefully follow the examples given in the following pages, even though they may be using predominantly digital instruments in the laboratory.
A portion of an easy-to-read meter scale is shown in Figure 6–4. Note that the space between whole-number values is divided into 10 parts so that each small division is equal to 0.1 (one-tenth). If the pointer is at position 1, the indicated amount is 0.3. At position 2, the pointer is halfway between 1.70 and 1.80, so the indicated reading is At position 3, the pointer is at the 2.6 mark.
Always be careful to note the value by the small divisions on the scale. On the meter in Figure 6–5, each small division is equal to 0.2. At position 1, the pointer is at 0.6; at position 2, the pointer is at 3.5; and at position 3, the pointer indicates 5.2.
It is customary to use decimals rather than common fractions to record the values of meter readings. For example, a scale reading is given as 8.75 rather than 83⁄4, or as 7.4 rather than 72⁄5.
The scale of Figure 6–6 represents a dual-range ammeter. Such an instrument would generally have three terminals for making the connections labeled COM, 3 A, and 30 A. (The abbreviation COM denotes the terminal, which is common to all measurements.)
For the 30-ampere range (top scale), the test leads are connected to the COM and 30 A terminals. For the 3-ampere range (bottom scale), connections are made to the COM and the 3 A terminals.
The range of a meter is the maximum amount of the instrument at full-scale deflection. For the protection of the meter, the range should never be exceeded. Therefore, it is wise to measure unknown quantities on the higher range first before switching to a lower range for the sake of greater accuracy.
Notice that in our example, Figure 6–6, each pointer position has two different interpretations.

The scale in Figure 6–7 shows pointers indicating values at 0.08, 0.35, 1.04, and 1.49, the smallest divisions representing 0.02 ampere.


Figure 6–8 represents the scale of a 50-ampere ammeter. The smallest divisions here represent 0.5 ampere. The first position of the pointer indicates 22 amperes. De- pending on the accuracy of the meter mechanism, the next indicated position may be called 38.25 because the pointer is halfway between 38.0 and 38.5. However, if the accuracy of the meter is to within 2% of the full-scale reading, then the meter is accurate to within only 1 ampere. Therefore, there is no point in worrying about determining the meter reading to an accuracy of 0.5 ampere. To justify a meter reading of 38.5, the meter must have an accuracy of 1% or better, and to justify the 38.25, an accuracy of 0.5%.
When reading an analog dial, the observer’s line of sight should be perpendicular to the surface of the scale. If it is not perpendicular, a reading error known as parallax is


introduced, Figure 6–9. Therefore, highly accurate meters have a narrow mirror strip along the scale to help prevent such reading errors. The VOM depicted in Figure 6–1 is equipped with a scale mirror. On this kind of scale, the correct alignment is achieved when the mirror image of the pointer disappears behind the pointer itself.
6–3 OHMMETER SCALE INTERPRETATION
We are accustomed to reading analog meters with their numbers arranged from left to right and with the 0 digit on the left-hand side of the scale.
Most ohmmeters have the numbers of their scales arranged from right to left, with the 0 on the right-hand side of the scale, Figure 6–10. Recall that such instruments must be adjusted to the zero position by means of a special control (see explanation in Section 6–1).
Note that this is a nonlinear scale where equal spaces do not represent equal values. Note, for instance, that the space from 0 to 1 is greater than the space between 10 and 20. This makes the meter readings much more accurate toward the lower end of the scale (the right-hand side).
Ohmmeters generally have a range switch indicating multiplier values, such as 3 1, 3 100, 3 1K, 3 100K. This means that each reading taken on the scale must be multi- plied by the value indicated on the range switch.